
Short answer: On my June 2020 Tesla Model 3, I have traced interior rattles to the dashboard end, armrest, center console and lower door trim. Tesa fleece tape at the rubbing contact points resolved those noises. Before working on a panel, I used light pressure to narrow down where the noise changed.
Start with diagnosis: empty loose items, reproduce the sound and check one area at a time. During a road test, the driver concentrates on driving; a belted passenger can check a safely reachable panel without leaning out of position. Do your own hands-on checks while parked.
Find the noise · Tape and tools · Dashboard · Door and armrest · Console · Seat and belt noises
My experience: June 2020 Model 3, HW3, 76,000+ miles, original center console. All 13 photographs are my own. The confirmed repairs here are the dash end, armrest, center console and lower door trim, using tesa tape. I protected tool-bearing edges with masking tape before using a plastic trim tool.
Other areas: I have heard of noise around belt-height adjusters and rear seatbacks, but I have not taped or repaired those mechanisms. Later Model 3 and Model Y interiors differ; these photos are not removal instructions for every model.
Rattle materials: selection by job
| Job | Material / fit criteria | Owner result or boundary |
|---|---|---|
| Plastic-on-plastic trim contact | Thin automotive fleece tape; enough adhesion for the surface | tesa tape resolved my dash, armrest, console and lower door-trim noises |
| Protect tool-bearing finish | Temporary masking tape plus plastic trim tool | Used on my dash and console edges |
| Different trim build | Match access and clip layout before removal | My photographs show the 2020 interior |
| Fleece-tape alternative | Compare thickness, adhesive temperature range and surface compatibility | Do not assume every harness tape fits every trim gap |
| Seat-belt / seatback-lock noise | Inspection of safety mechanism | No tape, grease or padding modification recommended |
| Hidden contact cannot be identified | Qualified trim diagnosis | Avoid filling cavities blindly |
Find the rattle before removing trim
A sound that seems to come from one corner can travel through adjacent panels. Pressing a panel and hearing a change gives you a useful clue, rather than proof that a particular clip is defective.
1. Remove loose items
Empty the door pockets, console, glovebox and accessible trunk storage. Remove loose charging adapters, bottles, cables and aftermarket inserts. Check again under the same conditions before buying materials or removing a panel.
2. Compare one area at a time
I have used a passenger’s help to press panels and listened for a change. I also checked areas I could reach myself. For a repeatable and less distracting method, do your own pressing while parked; use a properly seated passenger for any safe, reachable checks during driving.
Keep the pressure light and compare one contact point at a time. If pressing one seam quiets the sound, release it and check whether the sound returns. Write down whether it depends on road texture, temperature, an open or closed lid, or something resting against the panel.
For a music-related buzz, reproduce it at a moderate volume while parked and compare gentle pressure on one accessible trim section at a time.
3. Separate trim noise from a mechanical problem
Do not classify a sound solely by whether it seems light or heavy. If it follows steering or braking, comes with a warning, or cannot be localized to trim, arrange inspection. My suspension-noise repair experience and wheel-scraping experience cover separate problems.
What I used: tesa tape, masking tape and a plastic trim tool
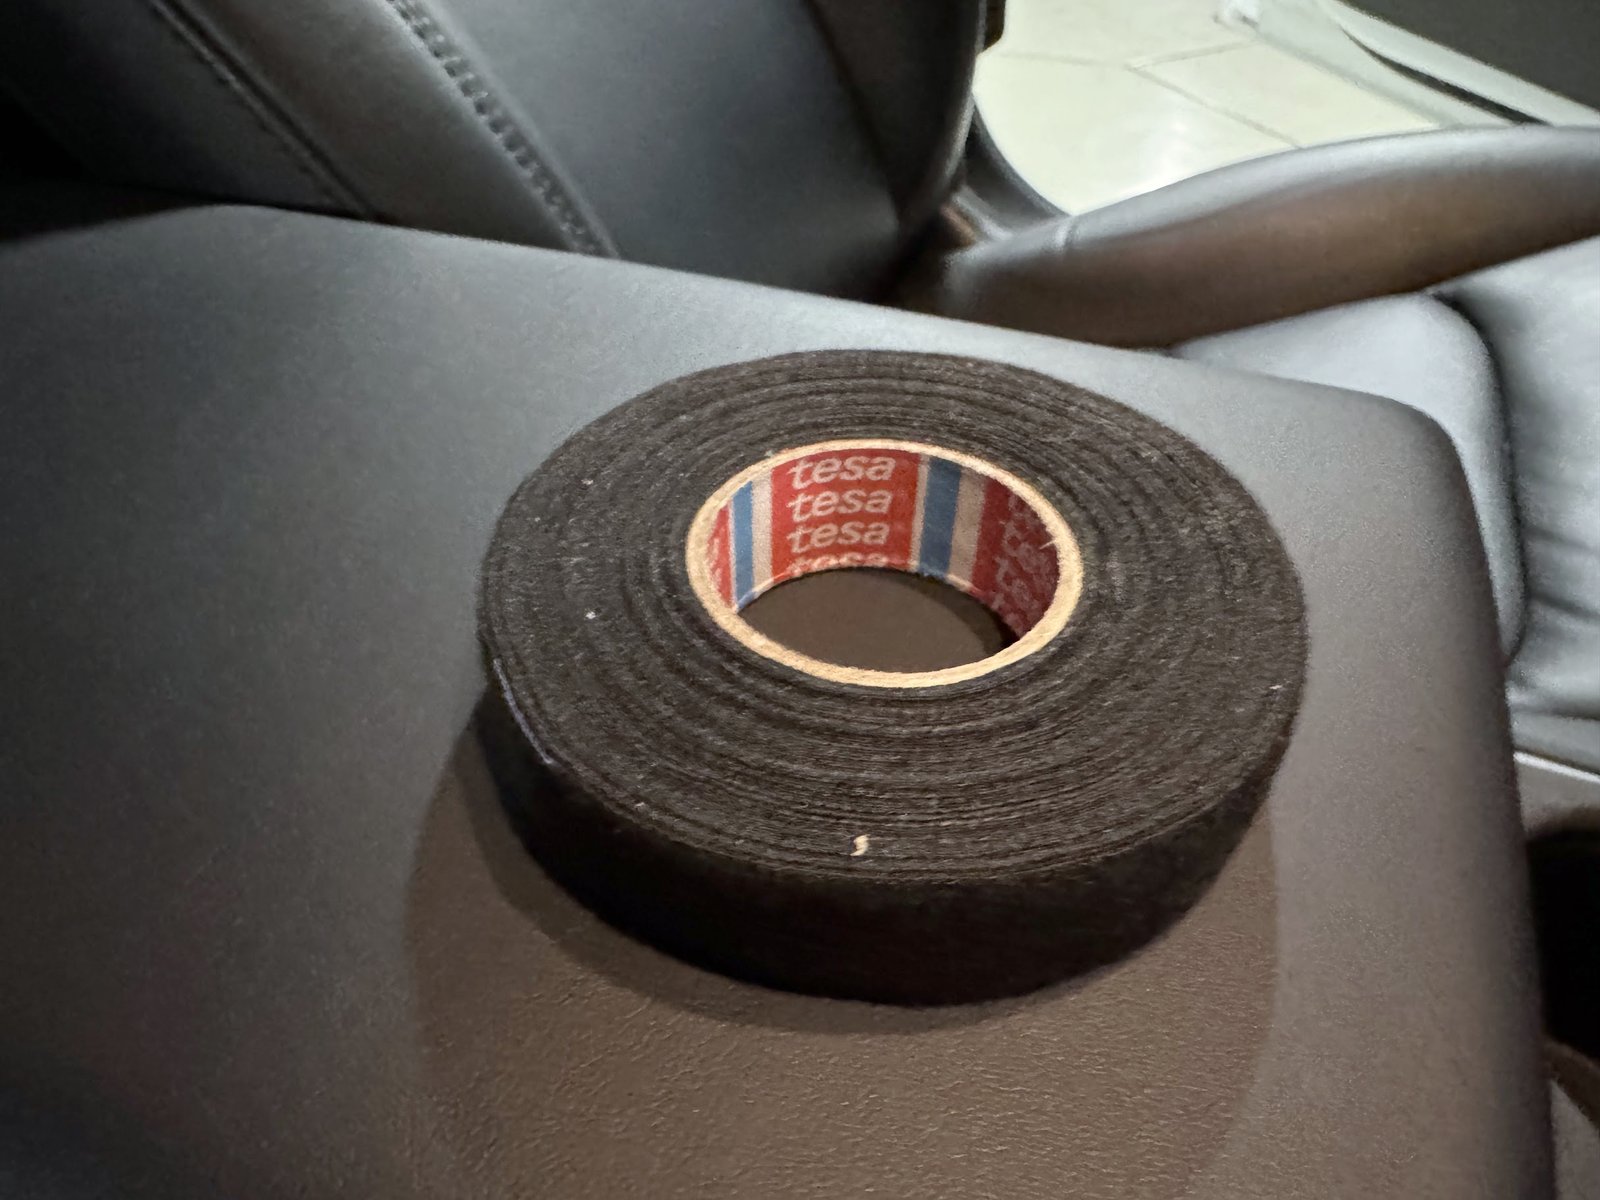
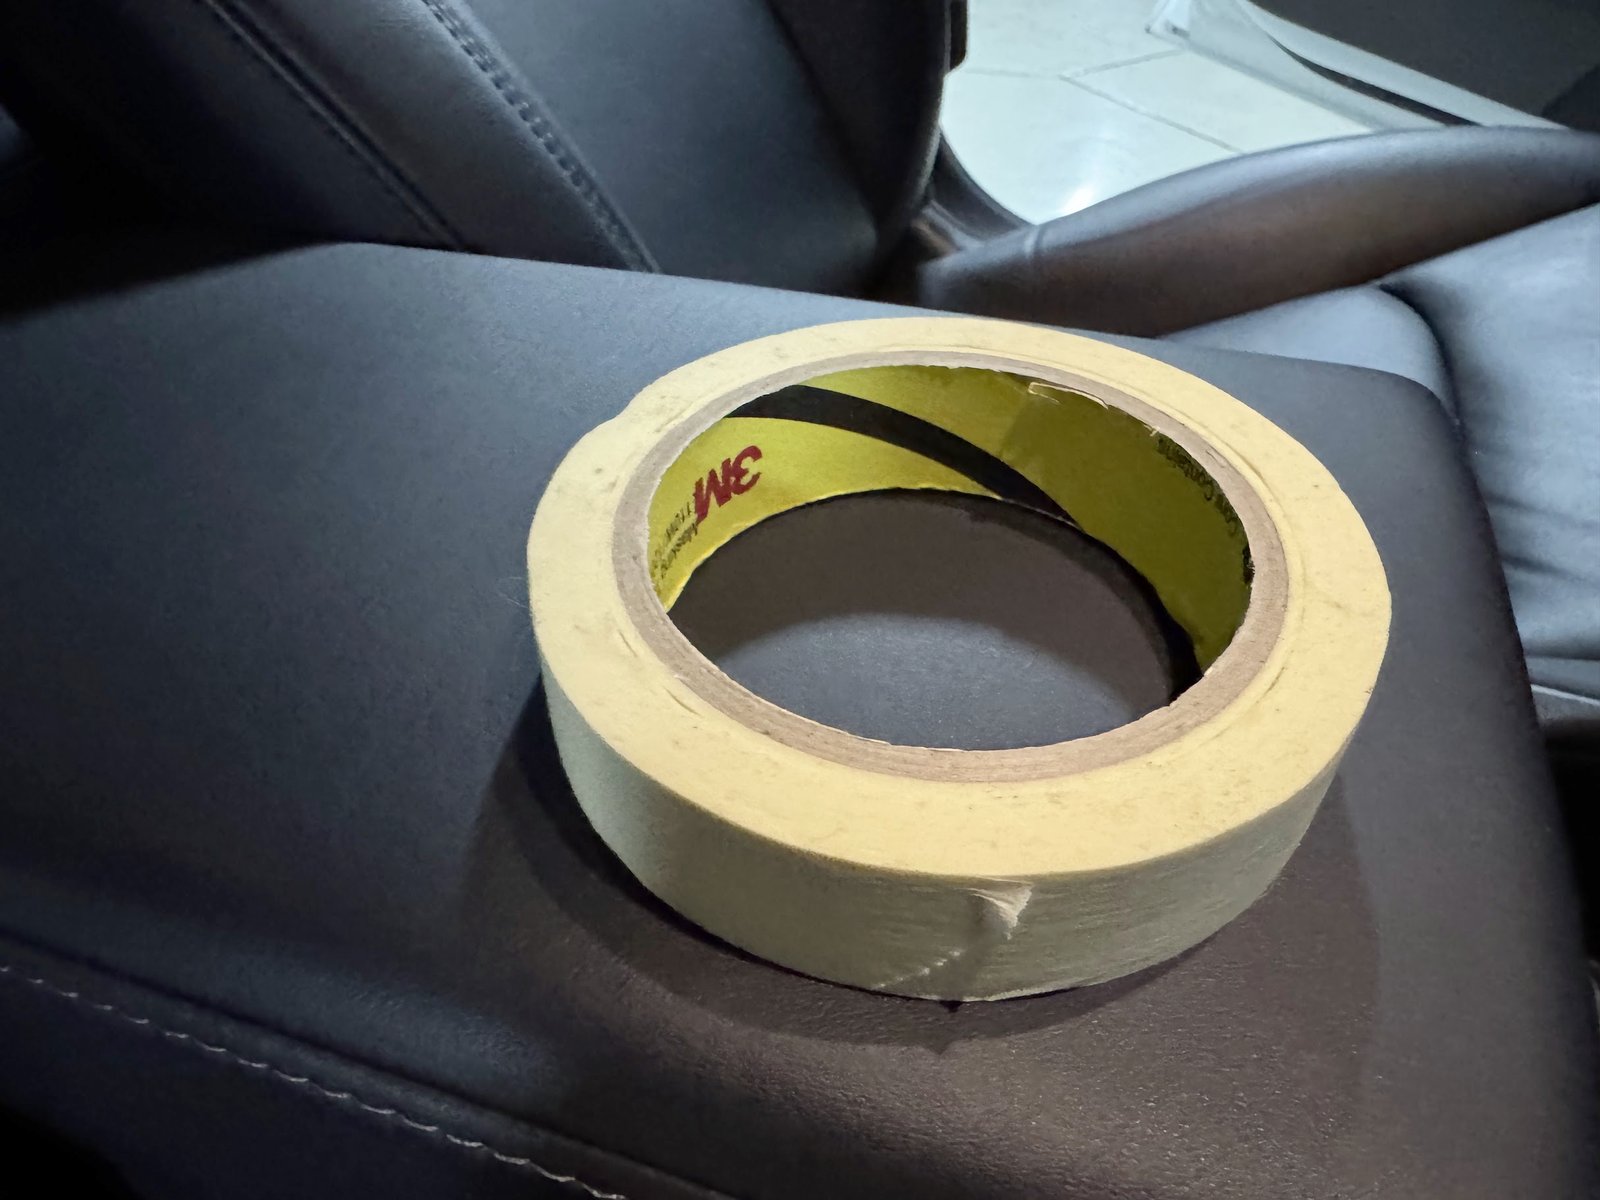
The tapes have different jobs. Fleece tape separates contacting surfaces. Masking tape protects the finish temporarily during tool use; it is not the anti-rattle material.
- Identify the rubbing contact before applying tape.
- Use a small, thin piece so the panel can seat normally.
- Keep attachment clips, screw holes, switches, wiring and moving mechanisms clear.
- Stop if a panel resists, a clip breaks or you cannot identify what is behind it.
- Check normal fit and operation before repeating the noise test.
Masking tape reduces the chance of a tool marking the finish, but it cannot protect against excessive force. Adhesive can also leave residue or affect delicate coatings; test a small hidden area and remove temporary masking tape promptly.
Dashboard-end rattle: my repair area
The end of the decorative dash strip was one of my actual noise locations. Pressure near this area helped narrow down the contact. The photos show my 2020 trim layout and the end cap with its attachment points exposed.
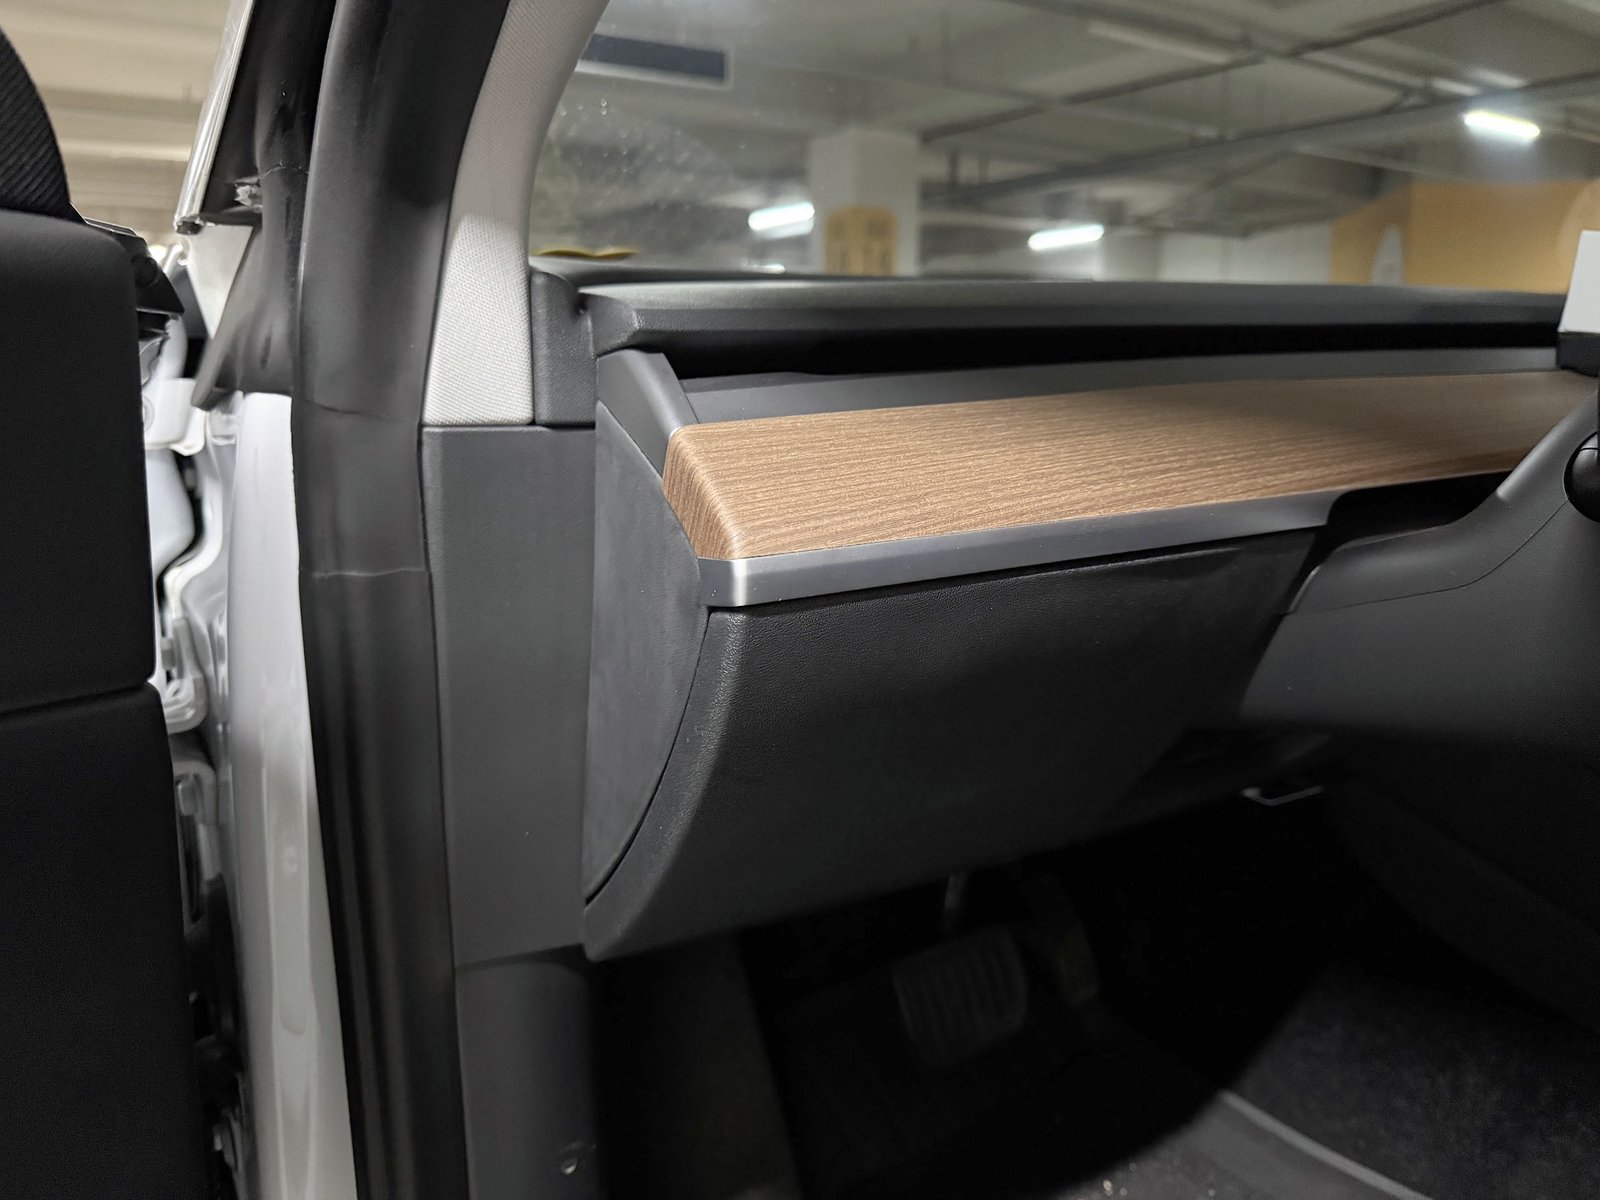
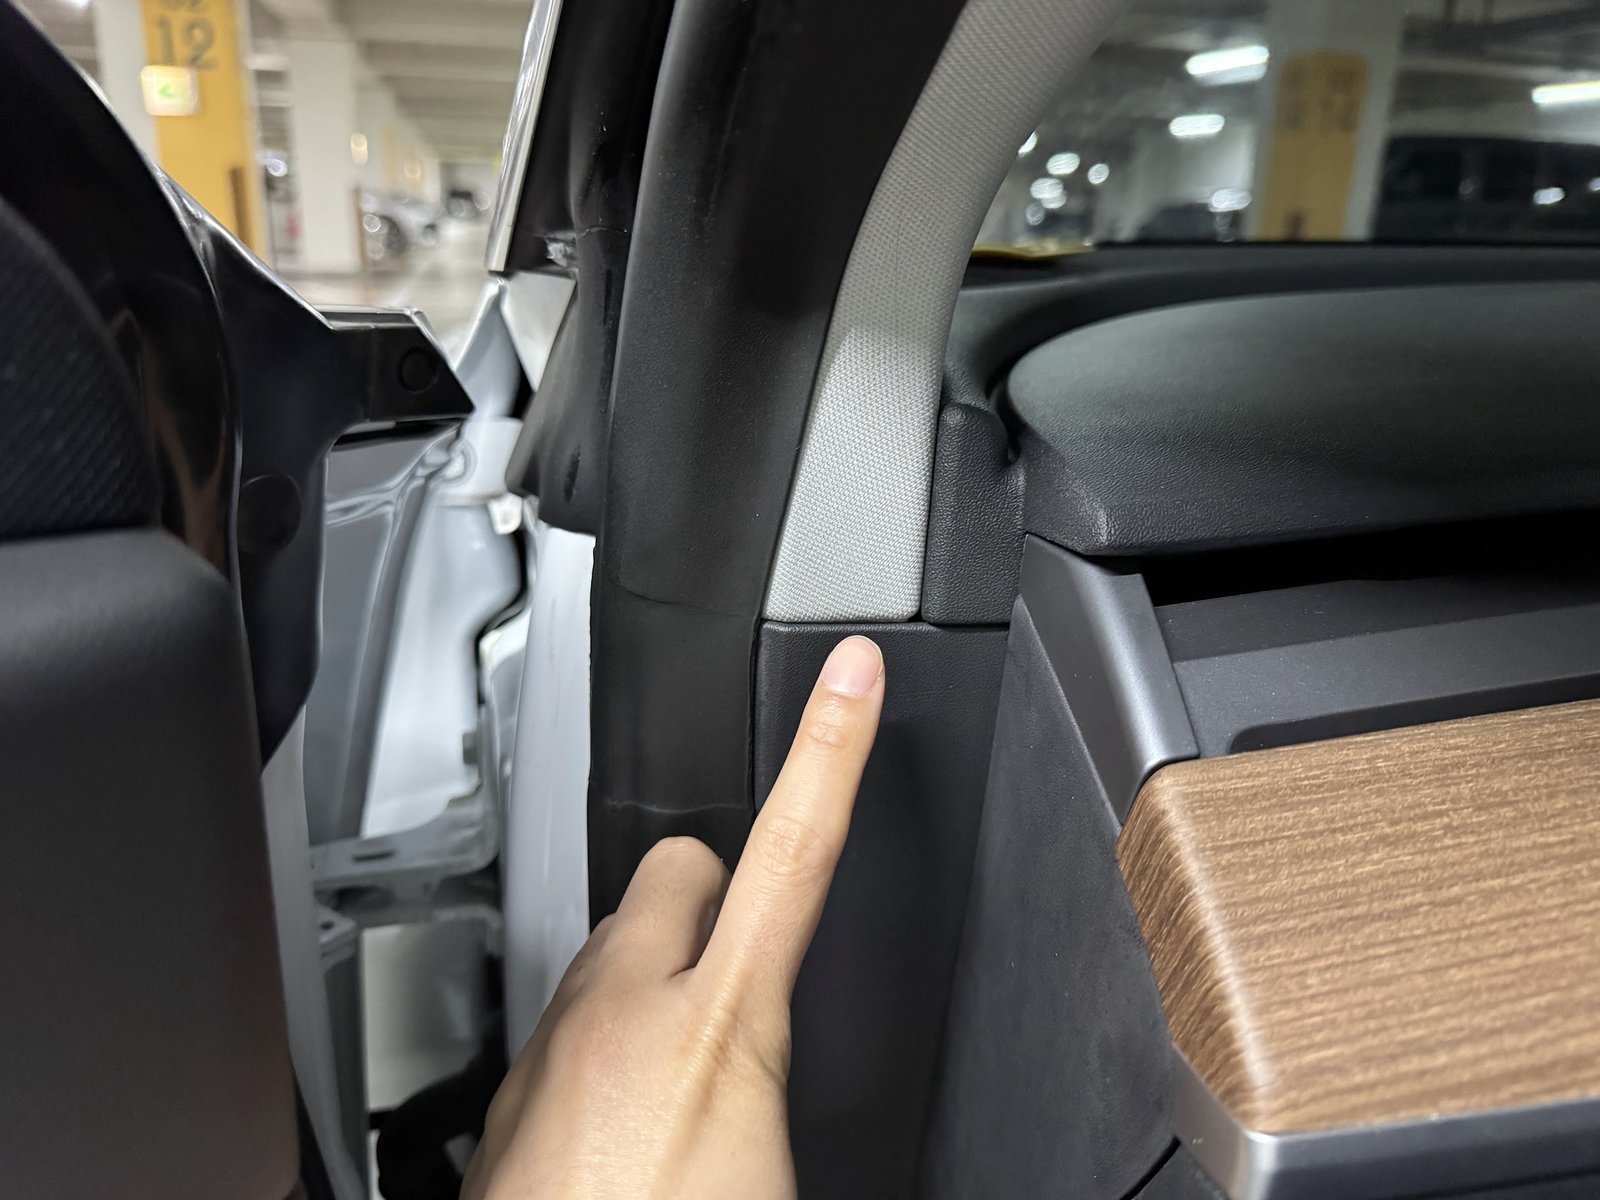
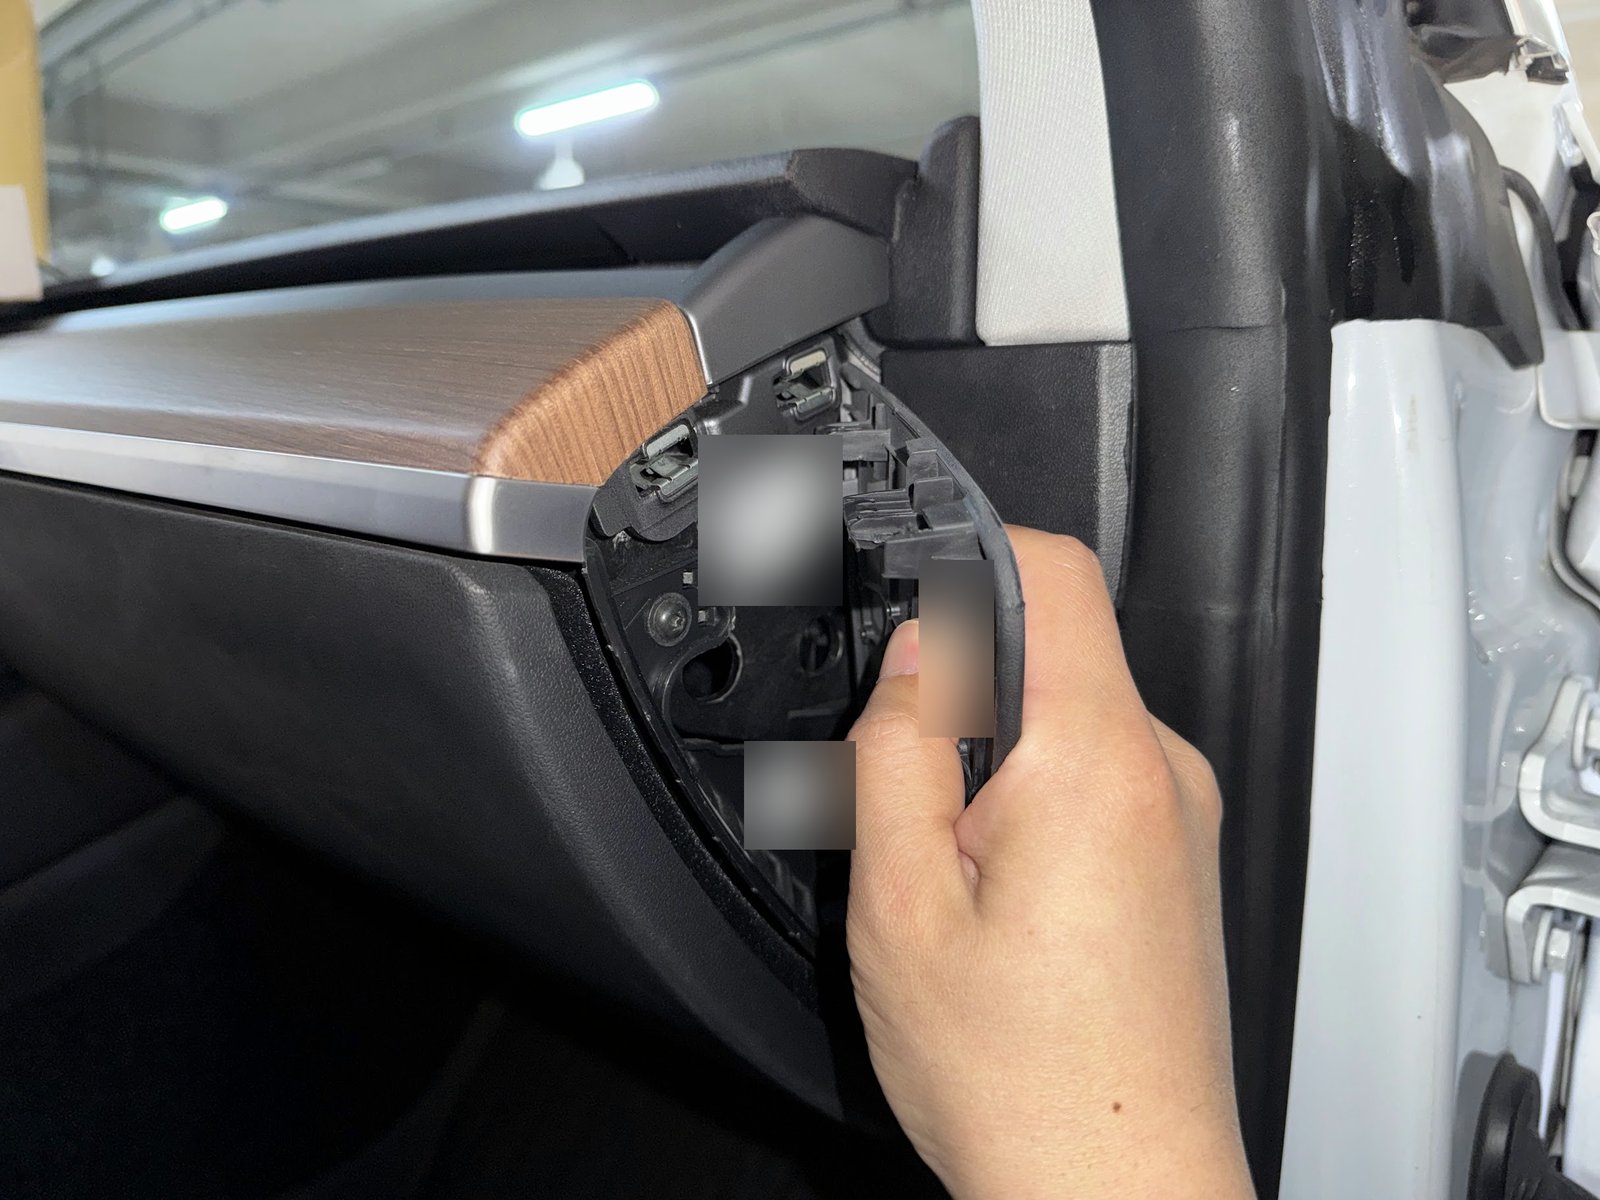
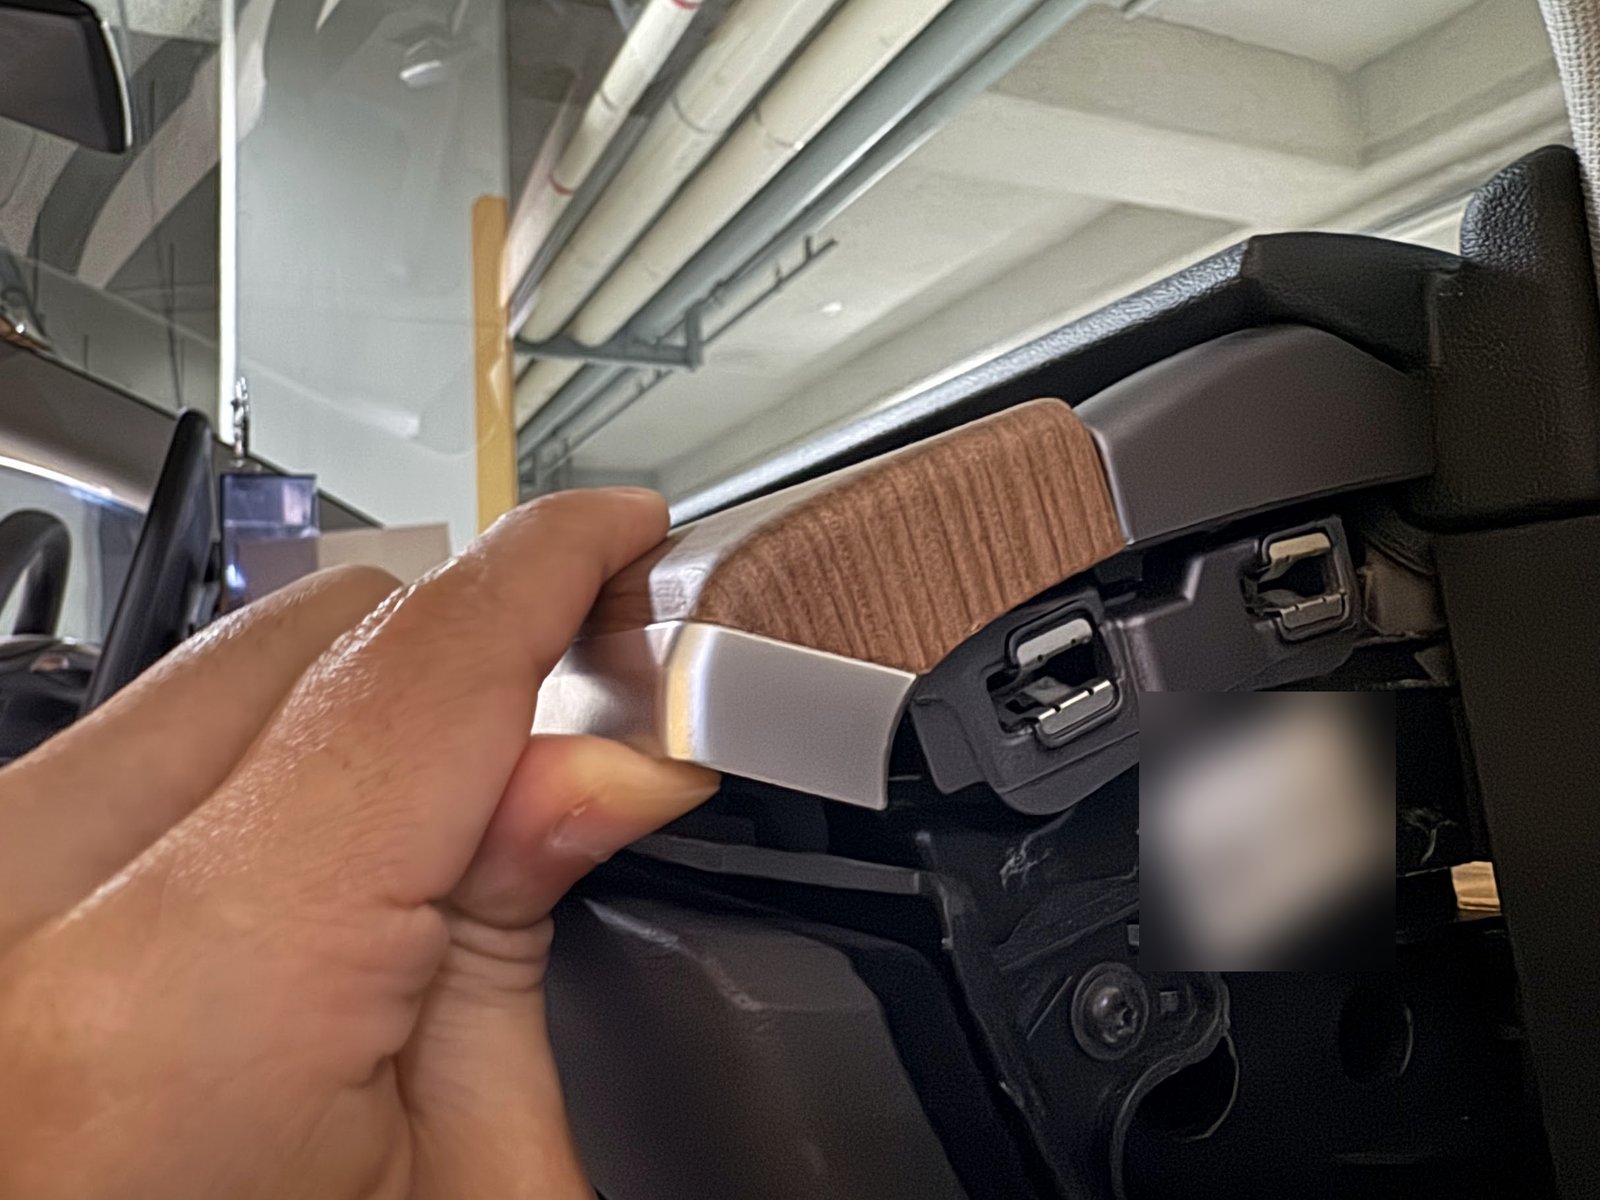
My approach was to identify the contact, protect the surrounding finish, access the non-safety trim and add tesa tape at the rubbing surfaces. After refitting, I checked that the cap was seated and repeated the noise check. The rattle was resolved.
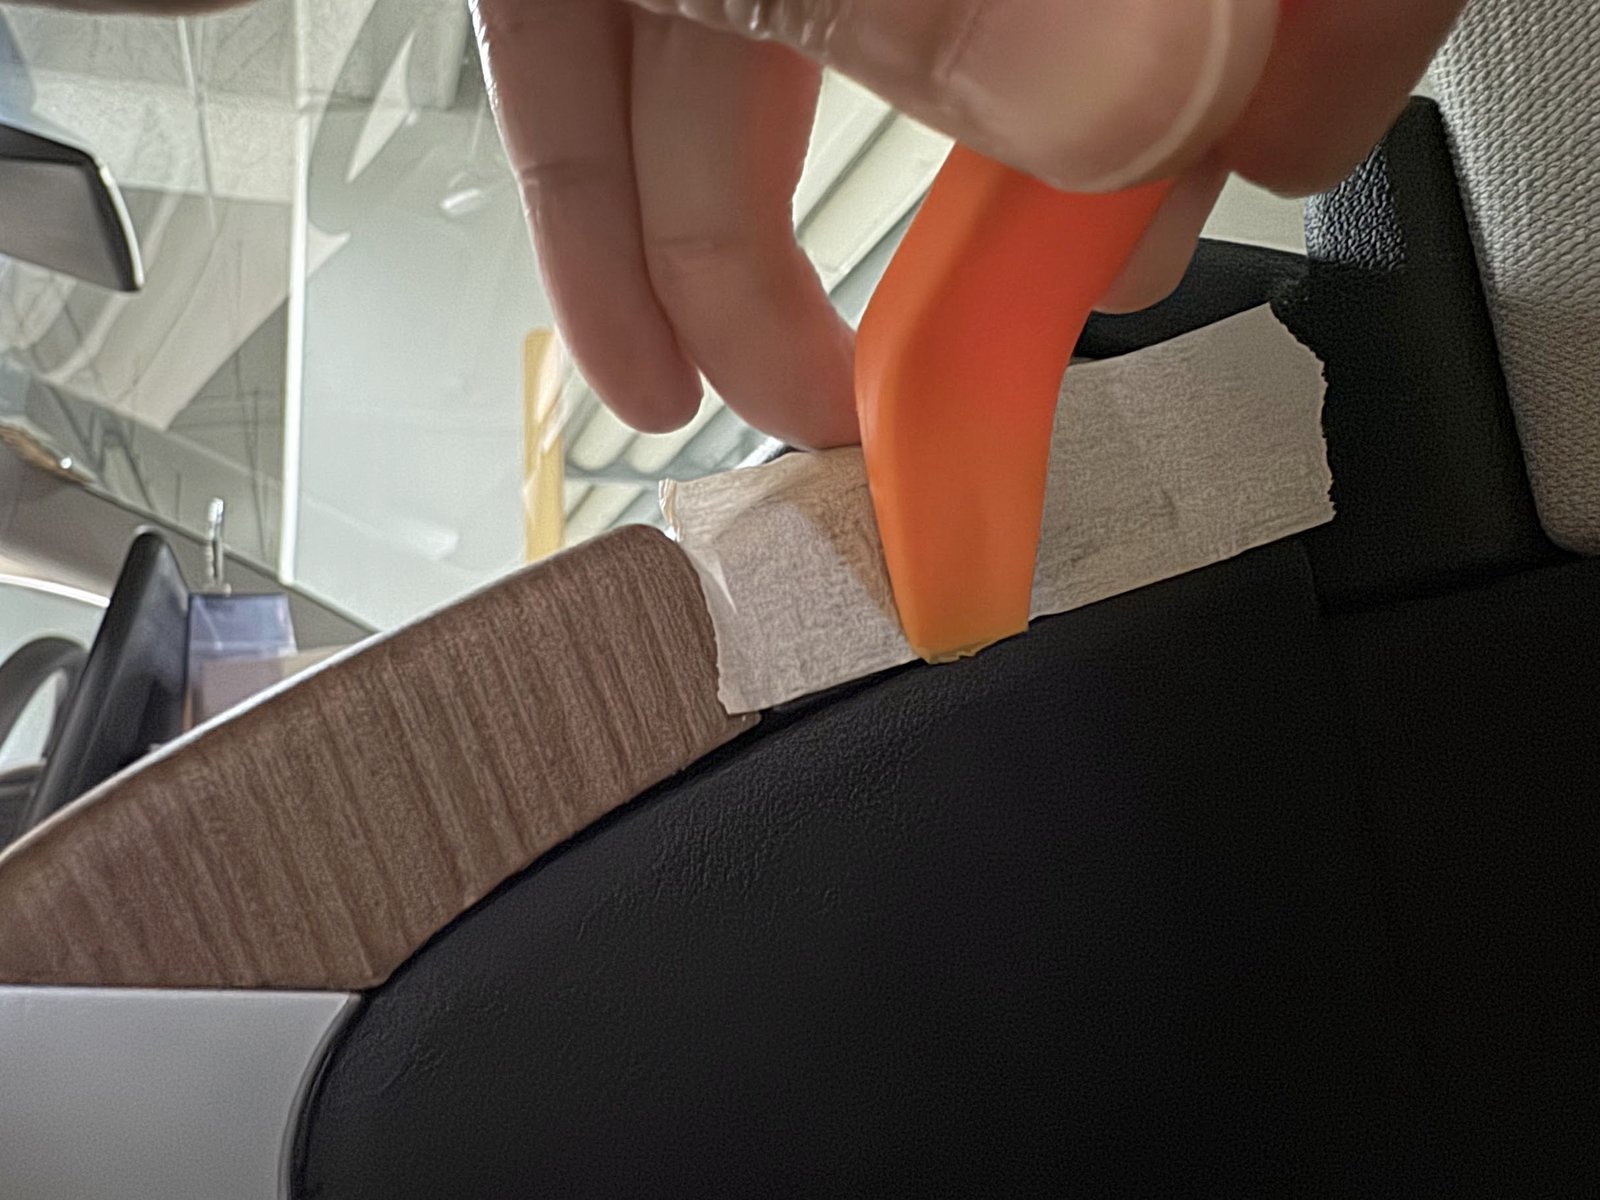
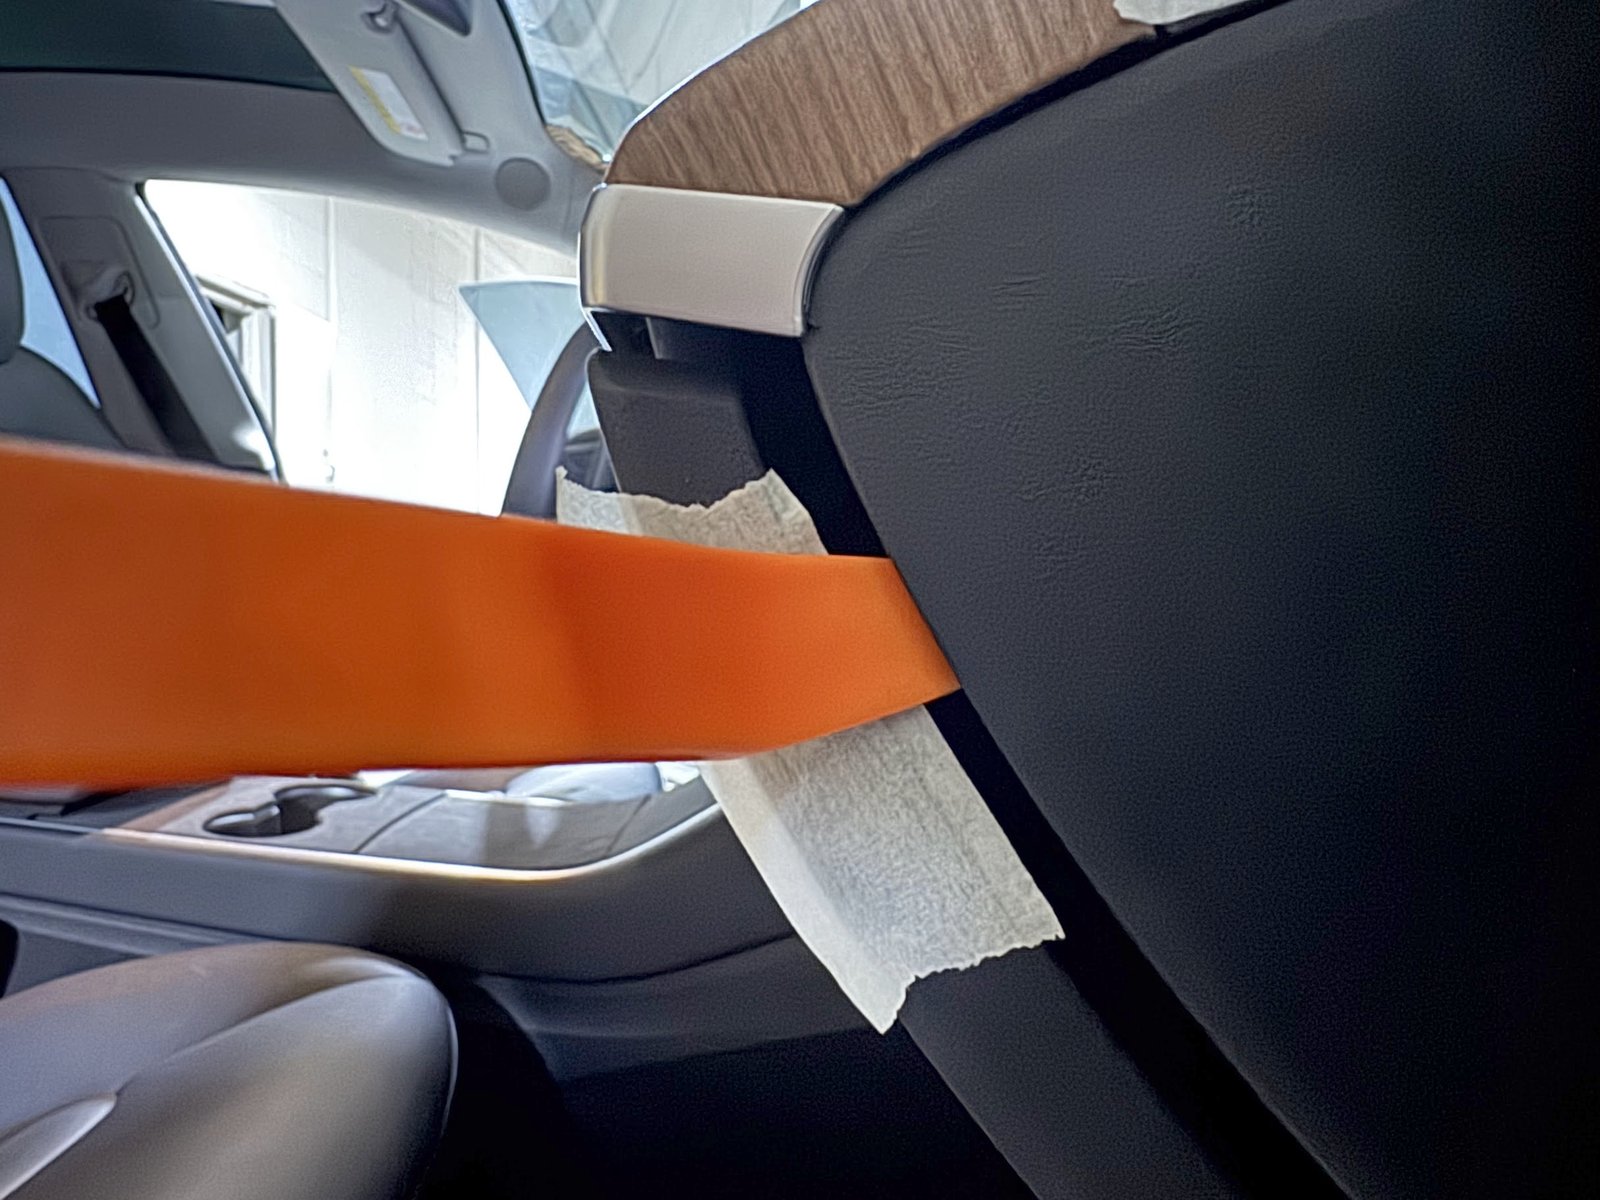
Do not blindly push tape deeper into a dash or pillar seam. If access requires disturbing an airbag area or you cannot identify the correct panel attachment, have a qualified technician trace the noise.
Armrest and lower door-trim rattles
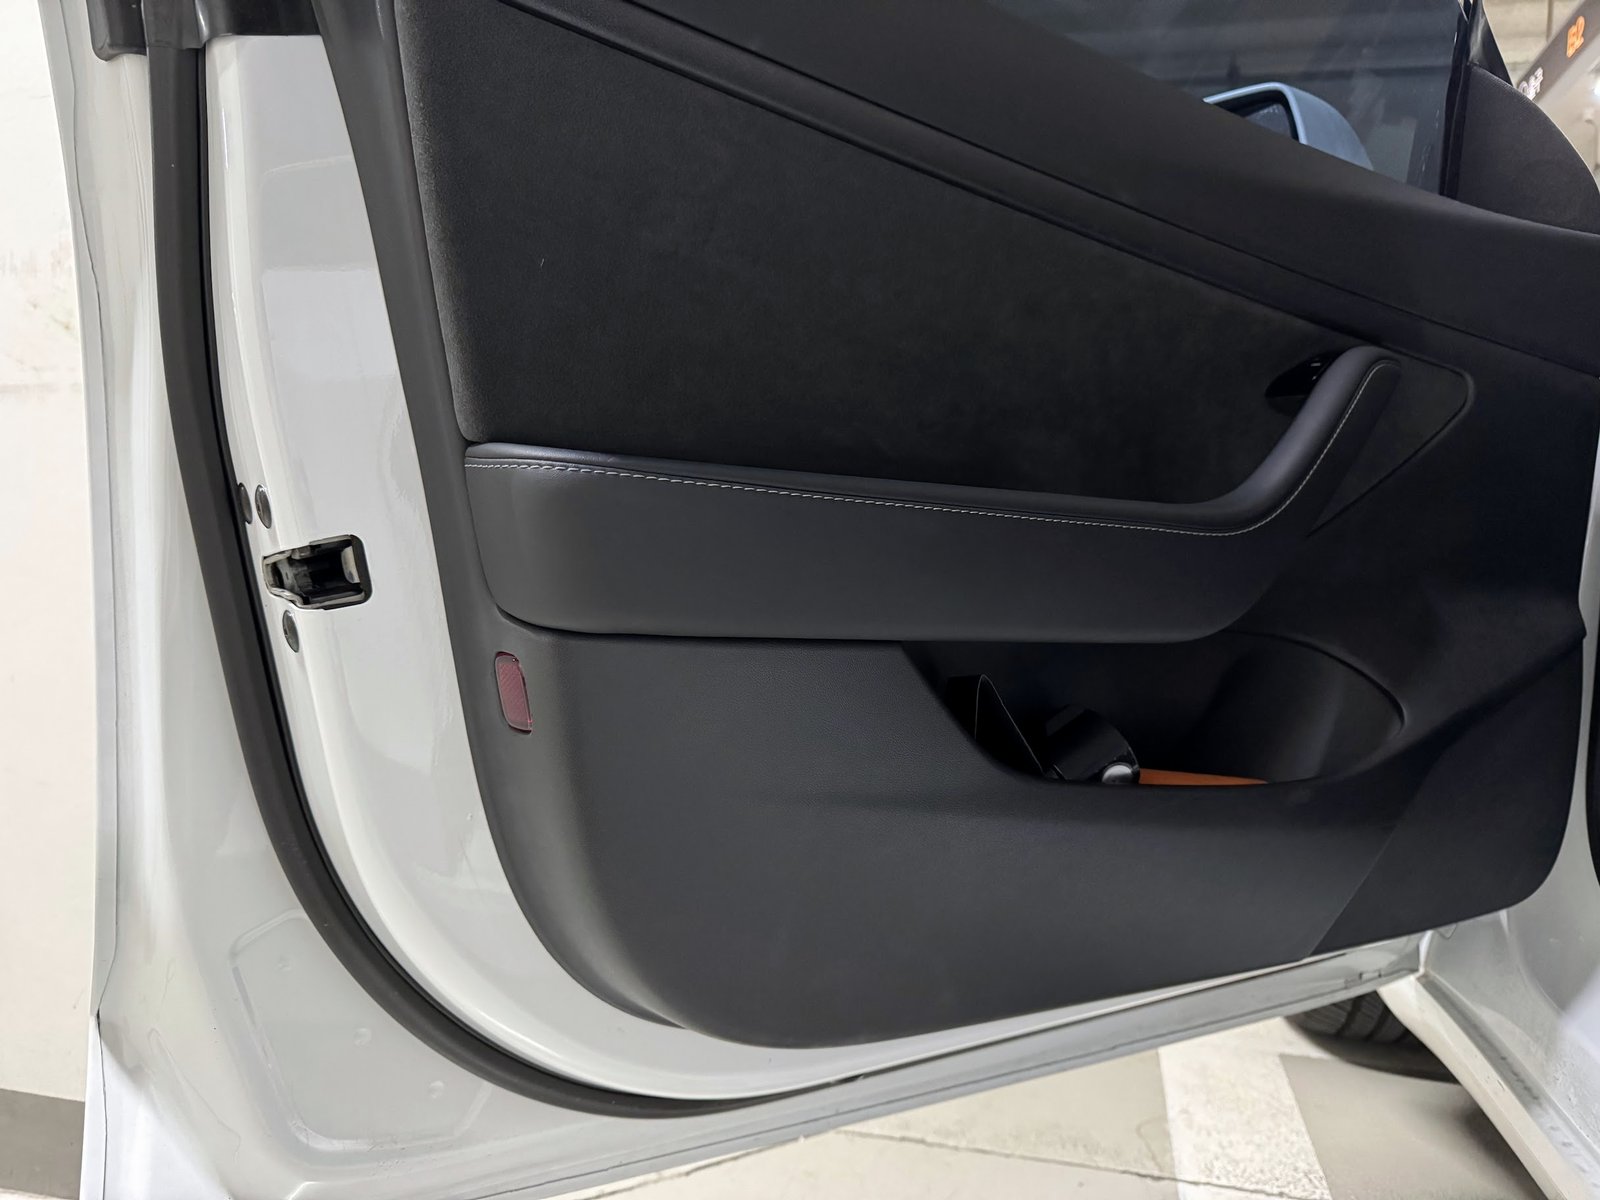
I also resolved noises at the armrest and the lower part of the door trim with tesa tape. Check the armrest and lower trim separately.
Start with the pocket empty and check the accessible trim while parked. Localize the rubbing area before disturbing it. The goal is to separate the contacting trim surfaces without preventing secure attachment.
If the noise seems to be behind the door panel, or access involves connectors, window hardware or the release mechanism, book service rather than probing inside.
If the problem is actually the window not closing correctly or damaged door molding, use my window and door-molding experience to distinguish those symptoms. Window calibration is not a general cure for door noise.
Center-console and cupholder trim
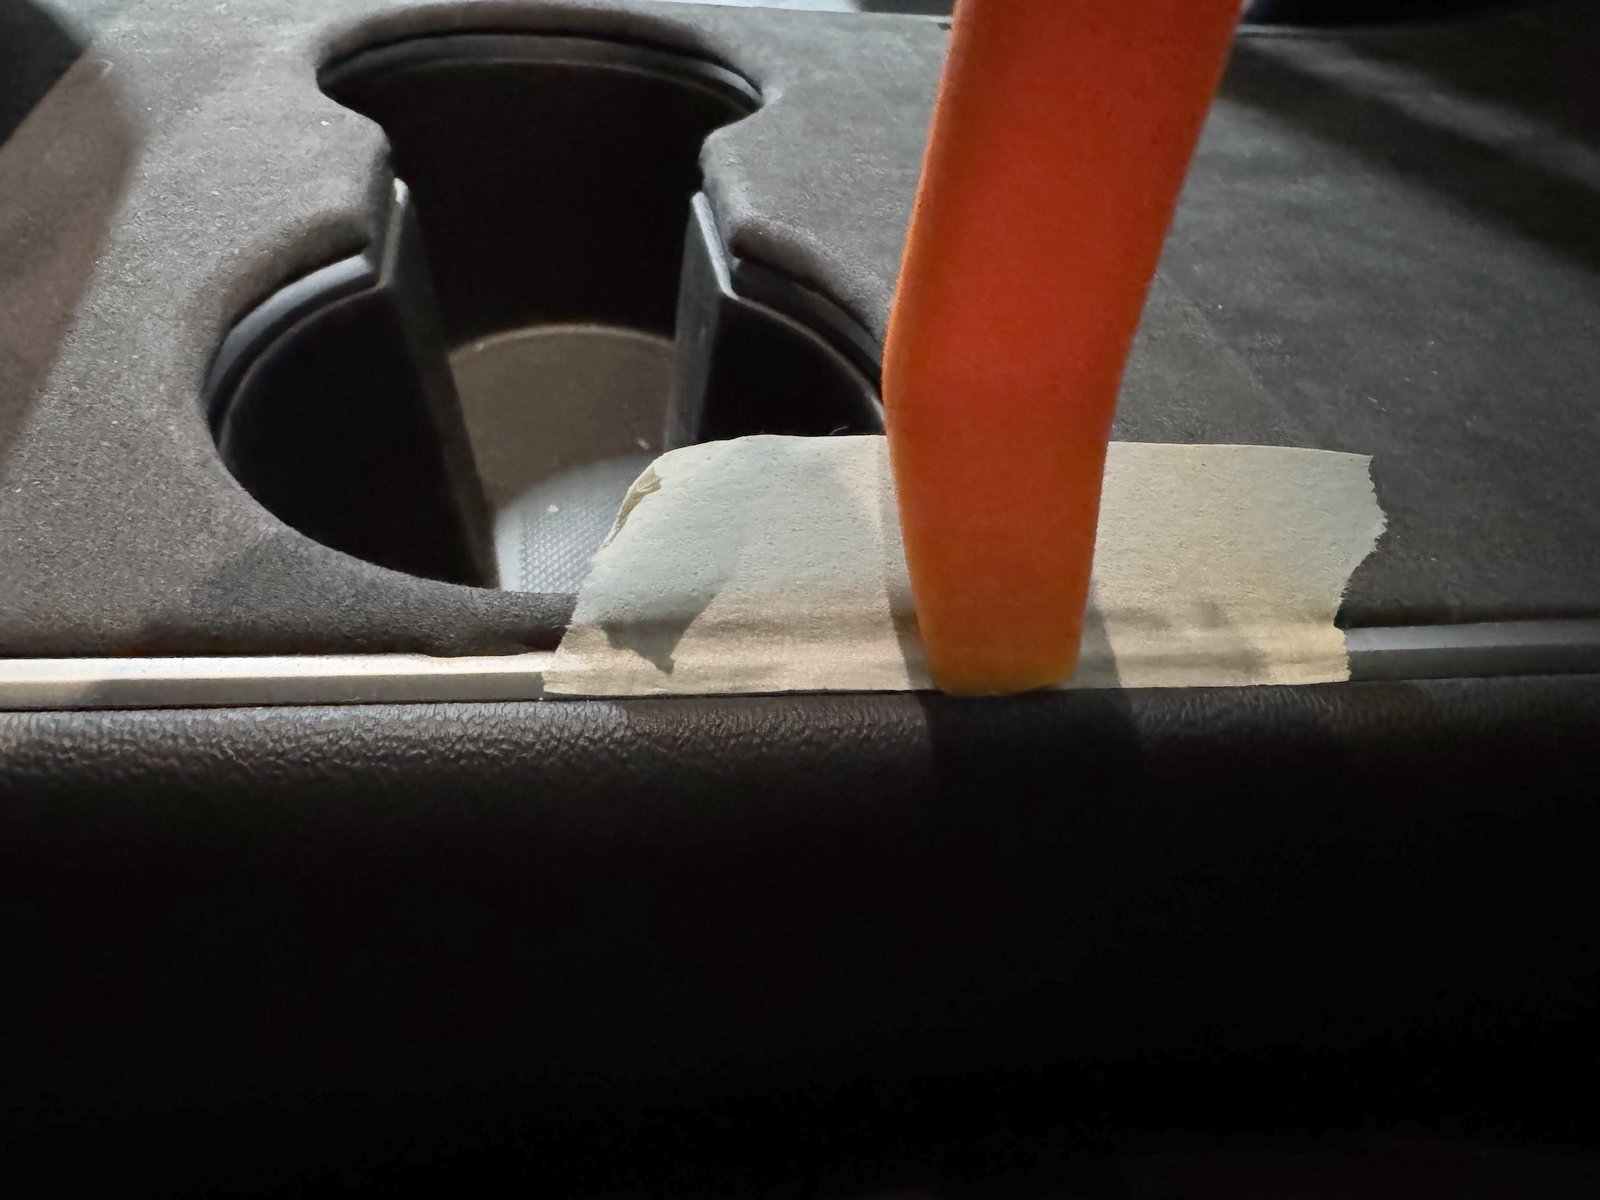
The center console was another confirmed location, and tesa tape resolved the contacting-trim noise. Remove cups, adapters and inserts first, then check whether pressure on the lid or surrounding seam changes the sound.
Keep tape away from lid catches, hinges, sliding mechanisms, charging connections and controls. If extra tape makes a lid stiff, prevents a panel from sitting flush or interferes with a latch, the fit is wrong. Do not build up layers to force a result.
My car has the original pre-refresh console. A refreshed Model 3 or Model Y can have different fasteners, lids and surfaces. Use the procedure for the installed console rather than copying the leverage points in my photograph.
B-pillar and rear-seat noises: inspect the safety hardware
For a click near your ear or a knock behind the rear seat, check the belt-anchor and seatback-latching functions described below. These mechanisms call for inspection rather than a trim-padding fix.
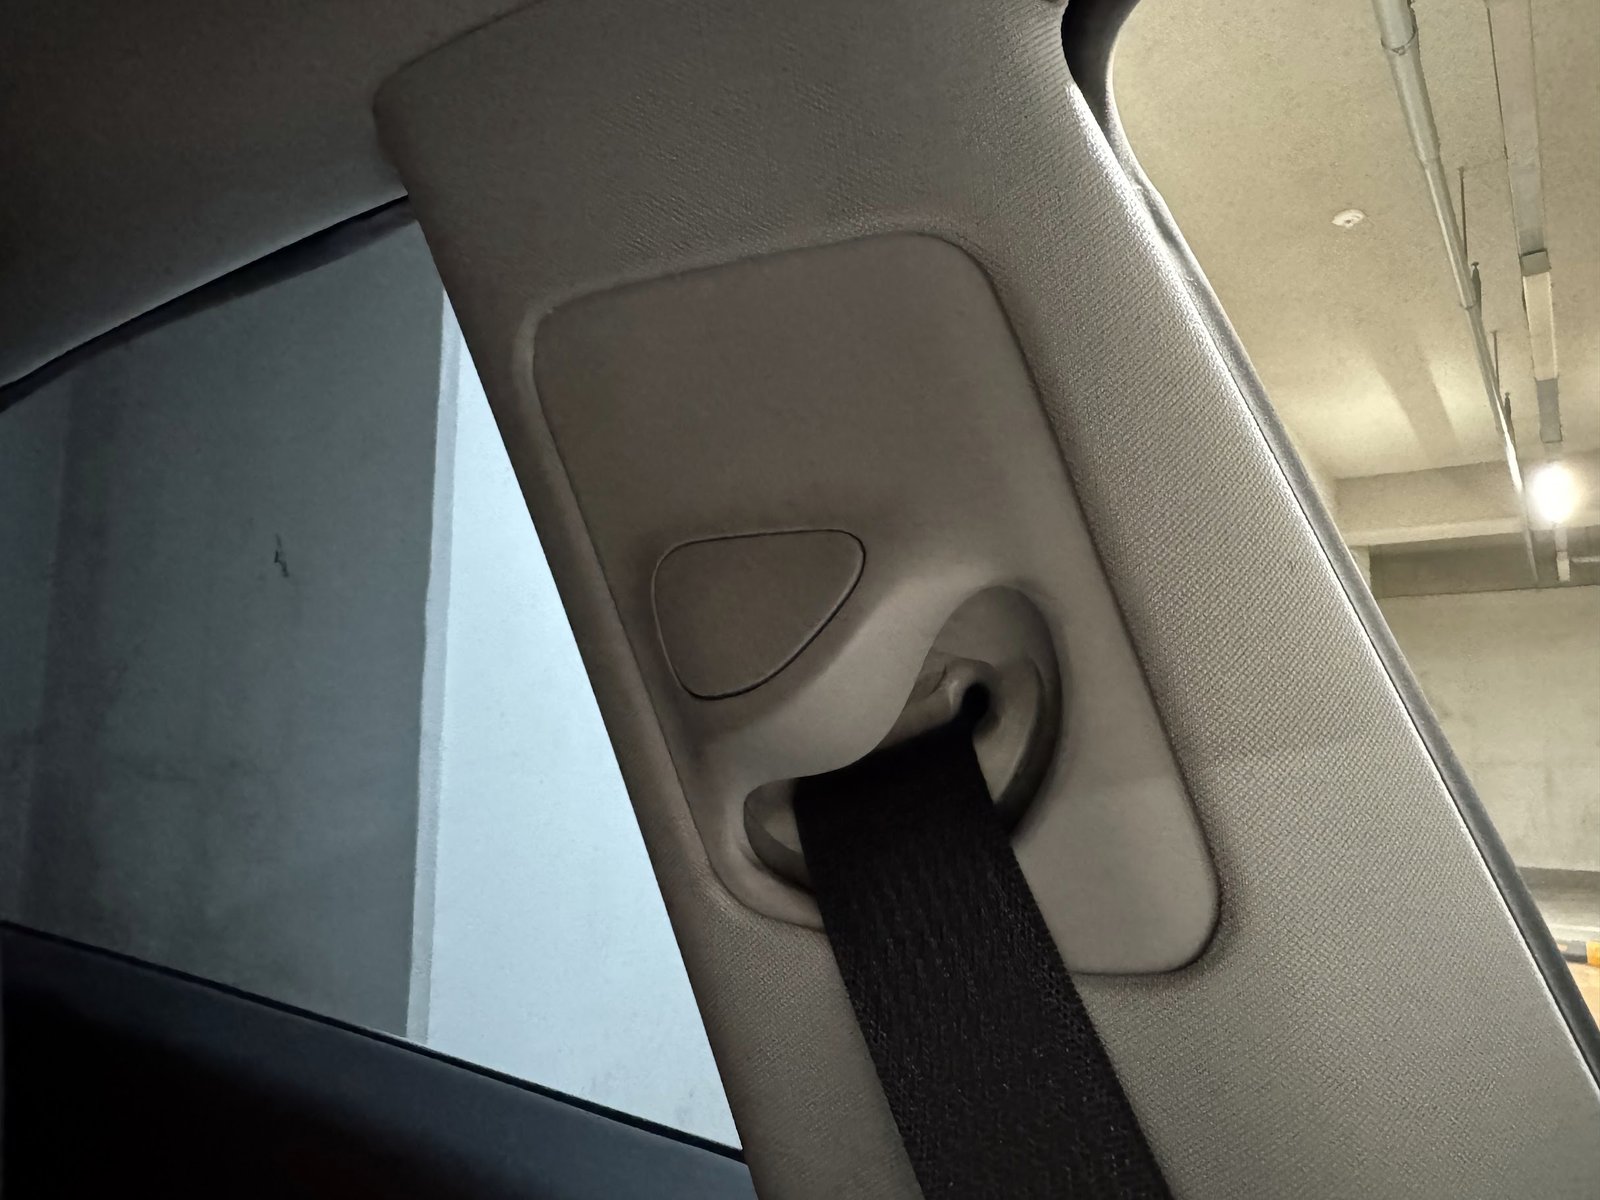
Set the shoulder anchor for correct belt fit and check that it locks, following Tesla’s instructions. Do not change belt fit just to quiet a noise, and do not add tape, lubricant or padding to the webbing, track, anchor or retractor. Have a persistent noise or abnormal operation inspected.
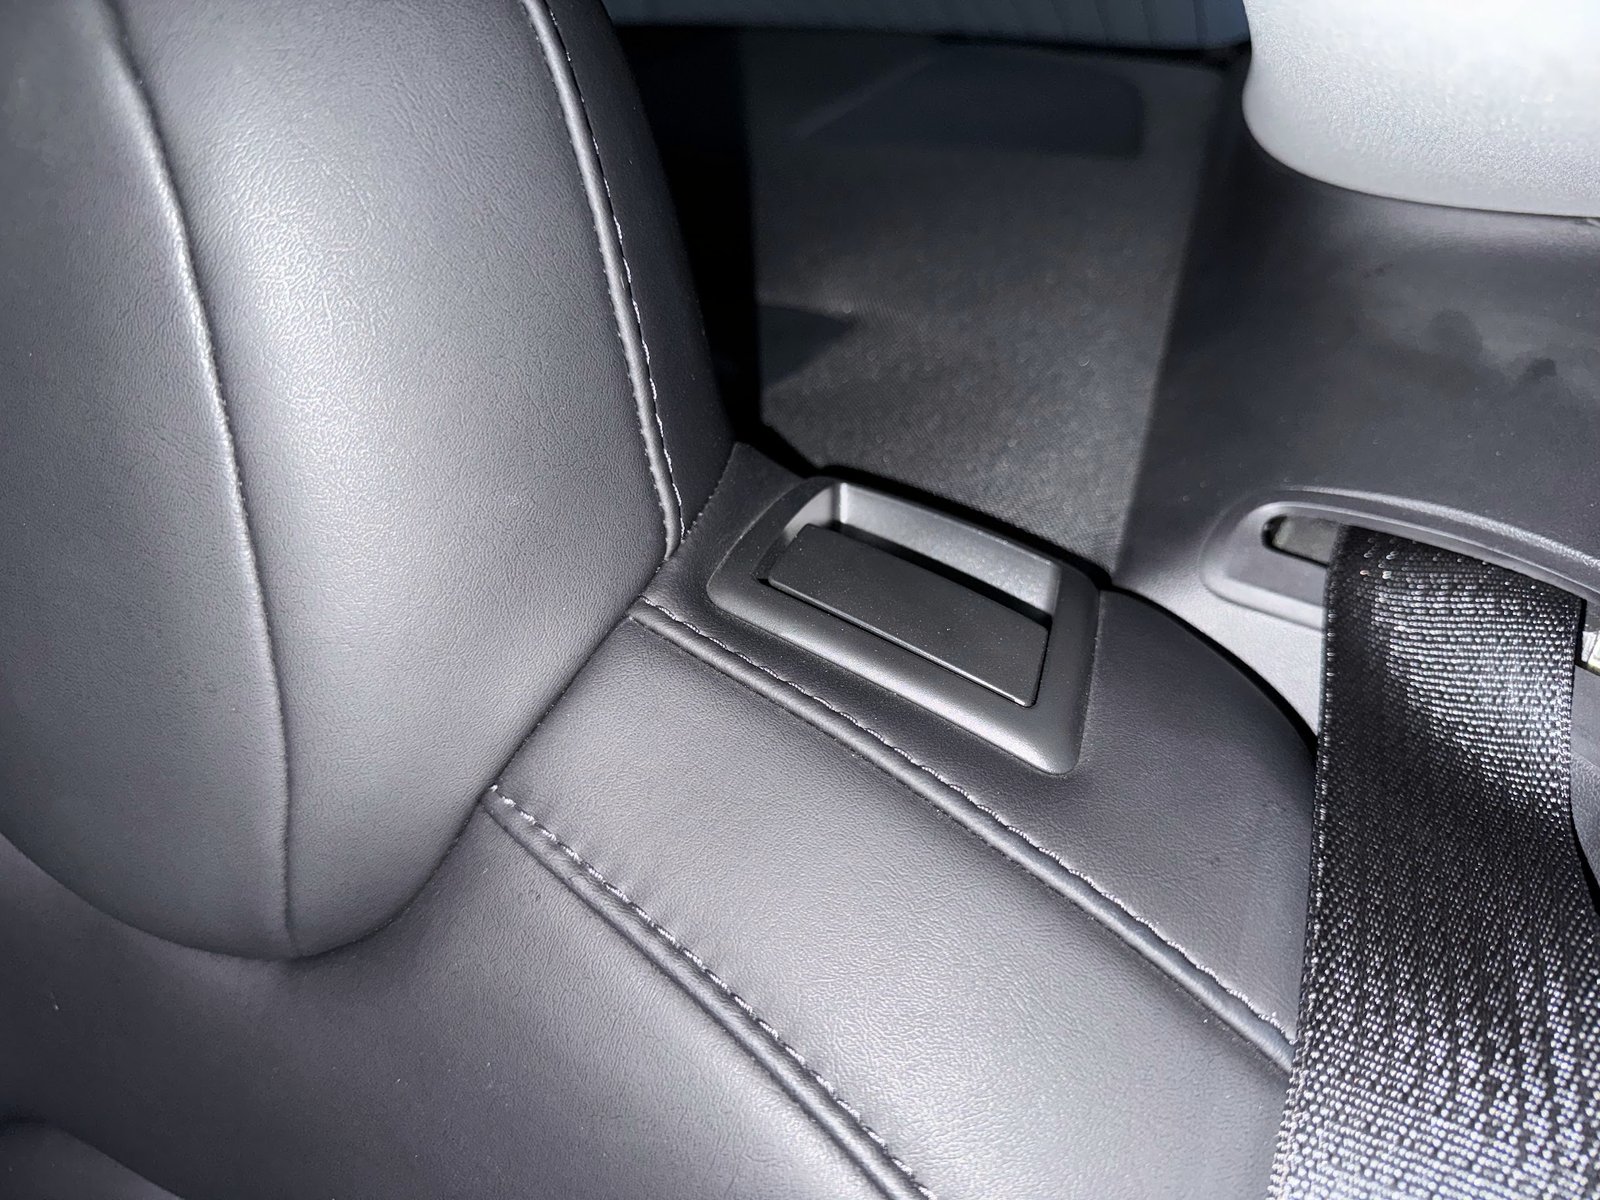
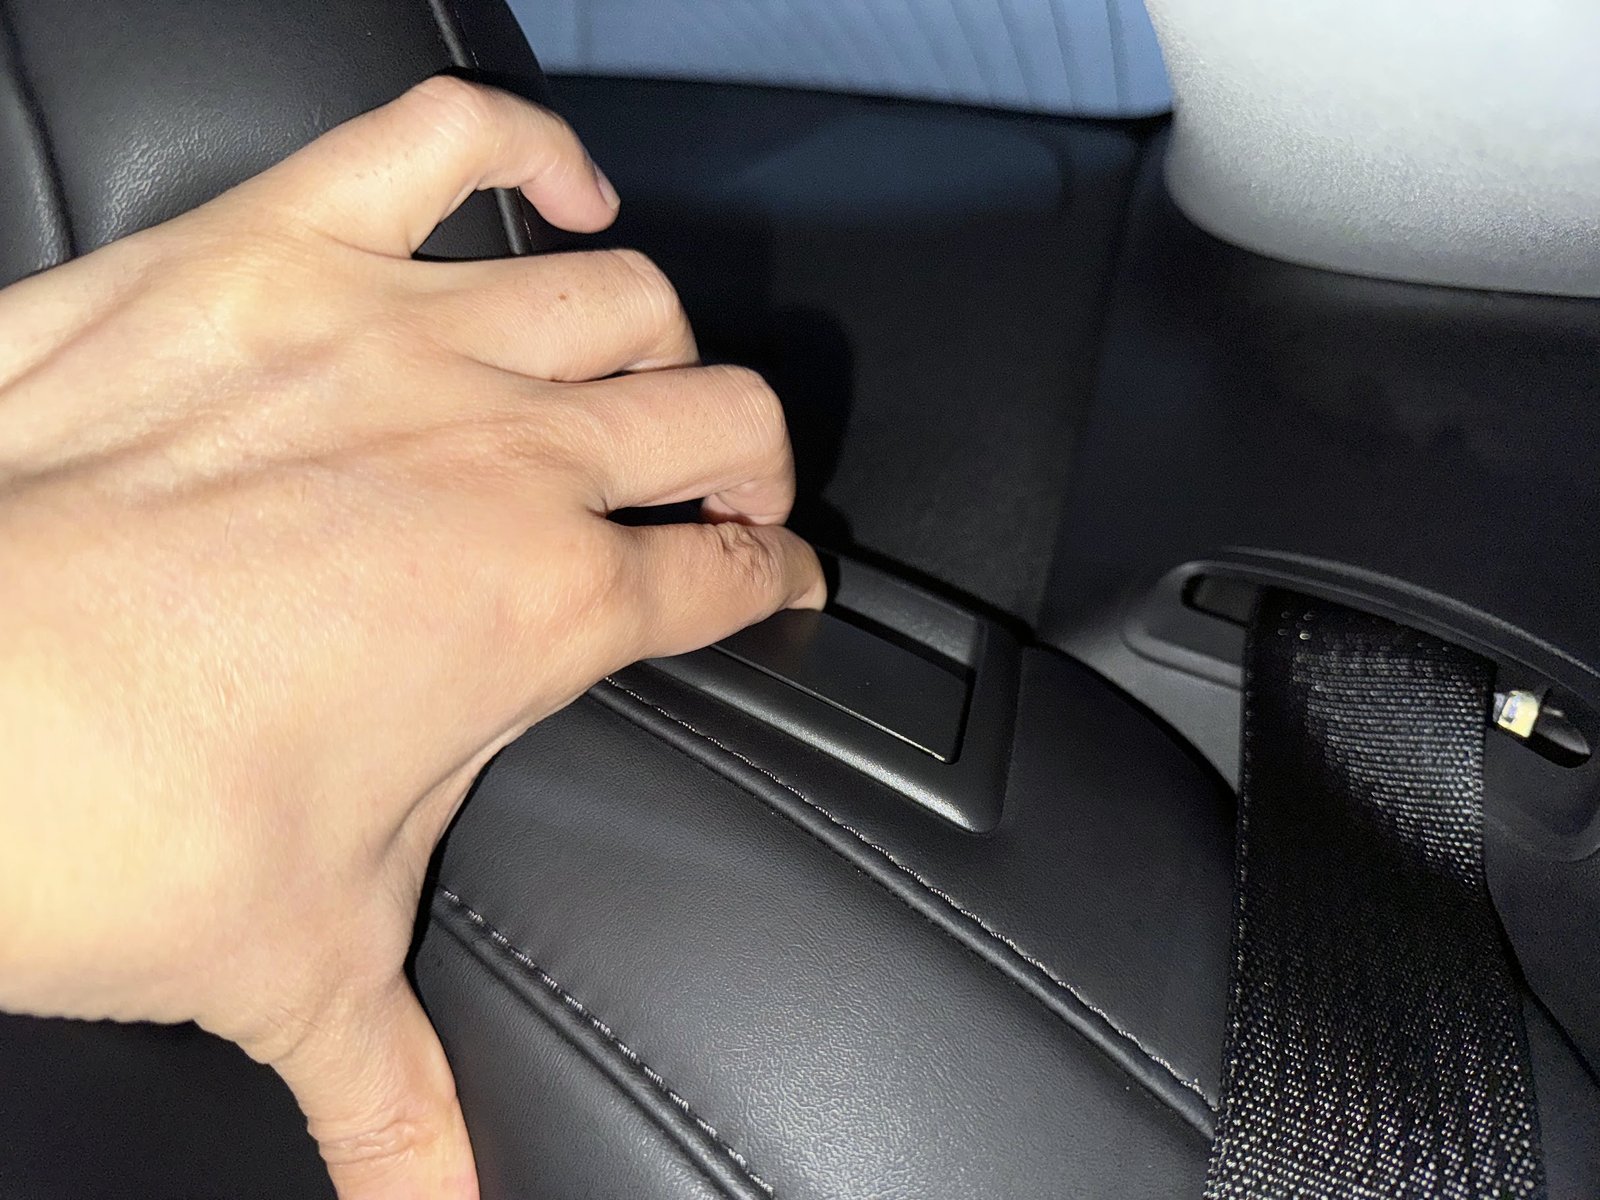
Ensure the seatback is properly latched according to the vehicle’s instructions. If it knocks, feels loose or does not lock securely, arrange inspection. A strip of tape around a striker should not be used to mask a locking problem.
Quick reference: what I actually fixed
Dashboard end: localized the contact and used tesa tape; noise resolved.
Armrest: contacting-trim noise resolved with tesa tape.
Lower door trim: contacting-trim noise resolved with tesa tape.
Center console: contacting-trim noise resolved with tesa tape.
Belt adjuster / rear-seatback latch: no personal repair performed; inspect safety-related symptoms through service.
Which anti-rattle tape and trim tools are worth buying?
1. Select for the contact and clearance
Tesla does not specify one universal aftermarket tape width or thickness for these owner trim repairs. Choose a thin automotive fleece tape that fits the confirmed rubbing contact without loading the clips. Check the adhesive’s surface and temperature suitability. A soft tape separates touching surfaces; a plastic trim tool and temporary masking tape help protect access edges.
2. Avoid adding thickness instead of locating the sound
Thick foam can stop a cap from seating, rigid wedges can stress trim and ordinary masking tape is not the permanent anti-rattle layer. Do not fill a cavity blindly. Locate the contact with light pressure, apply the smallest practical piece and refit the panel normally. Keep clips, catches, switches and safety mechanisms clear.
3. My tesa result and a documented alternative
Tesa fleece tape resolved my dashboard-end, armrest, center-console and lower door-trim rattles. The exact roll model is not recorded. If choosing another roll, compare published noise-damping use, thickness, adhesive and temperature range. For example, tesa 51608 PV0 is documented as passenger-compartment harness fleece tape with noise-damping properties; evaluate its thickness and surface suitability for your contact rather than assuming it is my photographed roll.
Buy the small kit first: appropriate fleece tape, plastic trim tool and removable masking tape. Reproduce the sound and confirm one repair before adding other materials. A panel that cannot seat properly needs its attachment checked, not more padding. Seat-belt and seatback-lock noises belong in the inspection branch.
Frequently asked questions
Did the felt tape work on your car?
Yes. Tesa tape resolved the noises I traced to the four trim areas above.
Do I need foam or silicone spray as well?
My confirmed fixes here used tesa tape. Diagnose the contact before adding other materials; a rubbing rubber seal, loose trim and a faulty latch are different problems. Keep chemicals away from belts, pedals, screens and electrical parts.
Can I claim this under warranty?
Coverage depends on the diagnosis and the warranty applicable to your vehicle. Record the sound, conditions and location and ask service whether a defective part is involved and whether diagnosis or repair is chargeable.
Will these steps apply to a Model Y?
The basic process—remove loose items, localize the noise and avoid safety systems—is useful, but my repair photographs and results are from a 2020 Model 3. Do not assume its panels or fasteners match another interior.
Safety references
Tesla’s seat-belt instructions and airbag locations and warnings are the reference for those safety systems. The tesa-tape repairs described above are my owner experience.
— Volt Fix Garage
Leave a Reply